

• Case Provider: Dr. Recep Uzgur
• Solution Used: Eighteeth Helios 500 Intraoral scanner and EXOCAD
• The workflow initiated with scanning using the Helios 500 and file importation into Exocad for further design.
• About the Dentist
Dr. Recep Uzgur was born in Turkey in 1984. After graduating, he completed his PhD in Prosthodontics at Ankara University in 2014. Dr. Recep Uzgur is a key opinion leader for many companies such as Eighteeth, ltero, Dentsply sirona, Asiga, Osstem Implant, and Bredent lmplant. He is the fellow of the European Prosthodontic Association. He is also a member of various associations, including the Turkish Dental Association, the Turkish Prosthodontics and implantology Association, and the European Prosthodontic Association. Dr. Recep Uzgur's special interests are in esthetic dentistry, digital dentistry, and implantology.
• Case
A 44-year-old patient presented with missing teeth at sites 15, 16, and 26.
The patient sought a permanent fixed solution for these edentulous areas.
In terms of overall wellness, the patient was in good general health, and there were no relevant medical history issues affecting the treatment.
• Initial Situation and Treatment Planning
After a detailed clinical and radiological evaluation, it was concluded that dental implants were the optimal fixed solution for the missing teeth.
Based on the presence of the sinus floor, implants of specific sizes were chosen: a 4 mm-10 mm for site 15, a 4 mm-8.5 mm for site 16, and a 4 mm by 11.5 mm for site 26, tailored for the best fit and function.
The implant was successfully placed in three months ago following a two-stage surgical approach.
During the follow-up stage, 12 weeks post-operation, healing caps were applied to get a soft tissue forms.
After leaving the caps in place for 10 days, the sutures were removed, and a further 5 days elapsed before impressions were taken to ensure comprehensive healing.
• Treatment Process
By the time of the final impression, all three implants had fuly integrated with the bone, and the soft tissues surrounding the healing caps were also completely healed, making them ready for the impression step.
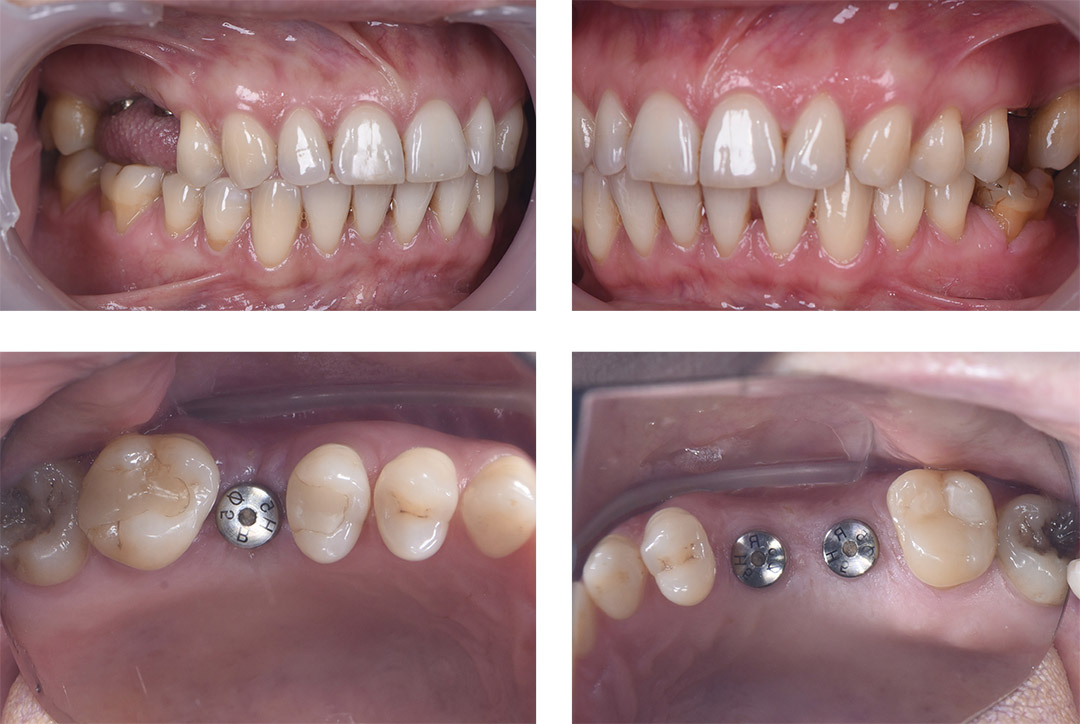
Once complete healing was confirmed for the implants on both sides, the healing caps were meticulously removed.
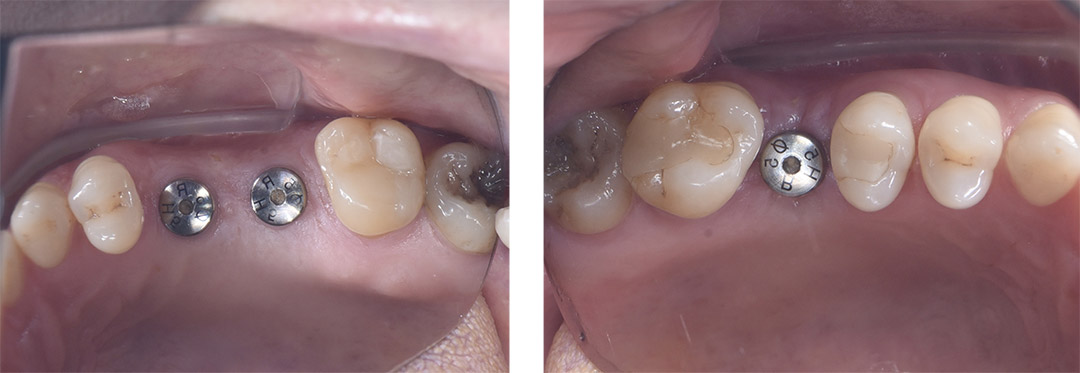
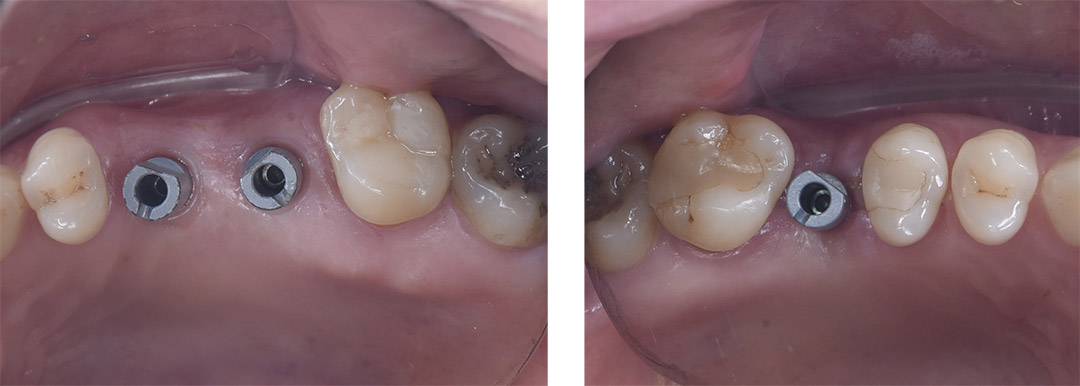
After their removal, a compatible implant-level scan body was secured to each implant following the manufacturer's guidelines.
These scan bodies play a crucial role in precisely capturing the positions and orientations of the implants, which is essential for the accurate design of the final prostheses.
• Intraoral Scanning Protocol
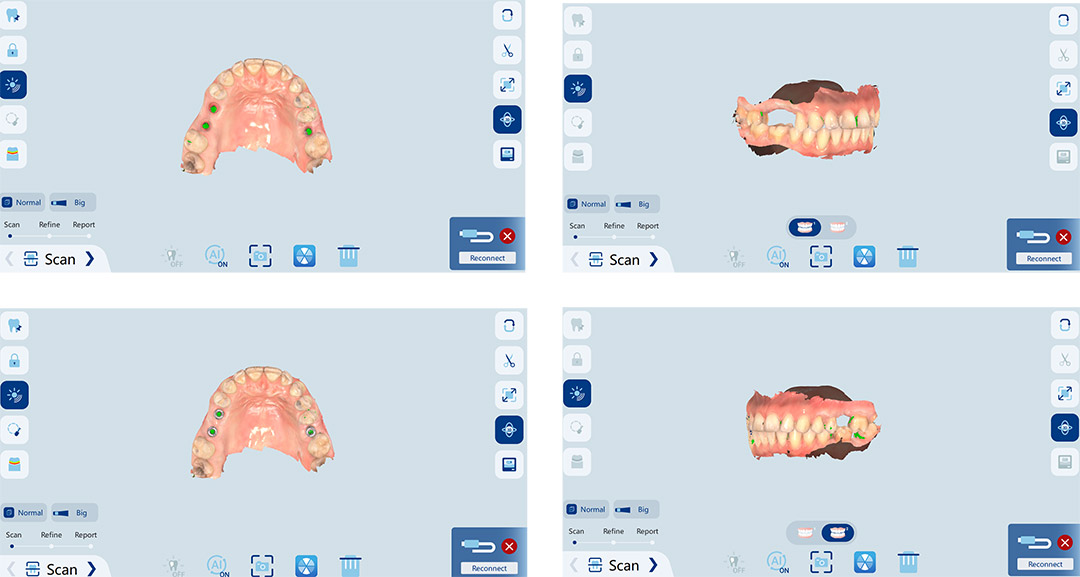
An intraoral digital scan was conducted using the Helios 500 scanner, capturing precise 3D images of both the upper and lower jaws' teeth and gums.
The scanning began with the upper jaw, meticulously documenting the entire area, especially the soft tissue around the missing teeth sites. The scan then proceeded to the lower iaw.
The patient was asked to bite down to achieve maximum intercuspation, enabling a buccal scan that records how the teeth meet from the buccal side.
Consistent with the Helios software's guidelines, a precise circular area within the scan target was selected and isolated for enhanced detail. This area, significant for the implants on both sides, was then re-scanned with the scan body affixed.
The software rapidly processed and combined these scans, assimilating the precise area scans with the overall jaw structure in a matter of seconds.
• Design and Milling
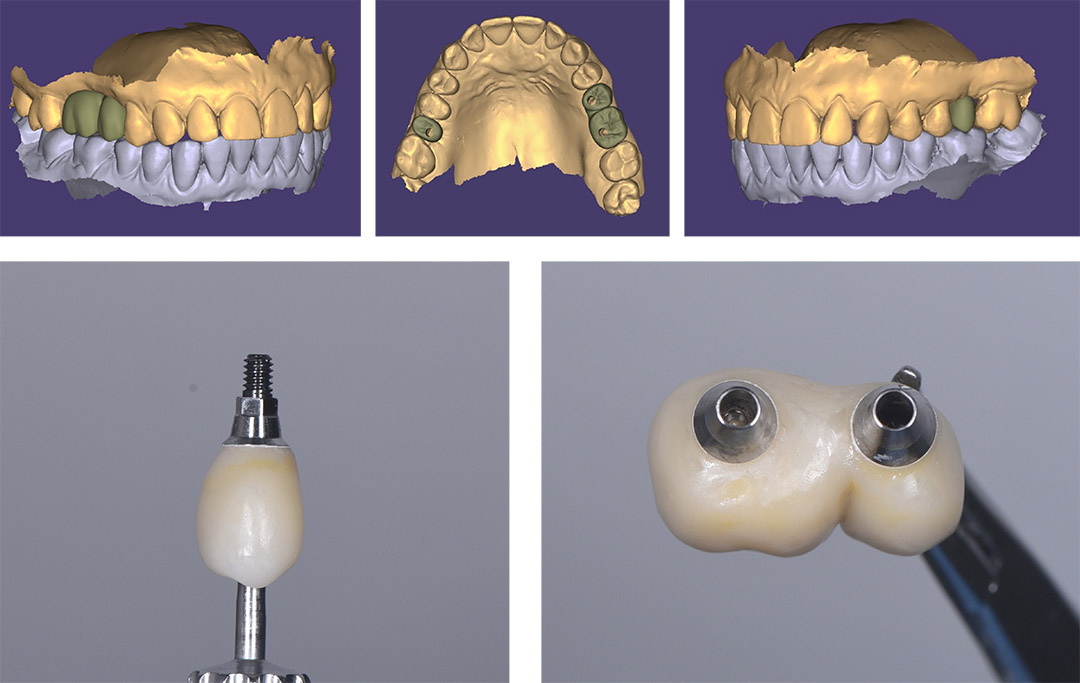
After the digital impressions were taken ofthe upper and lower jaws and bite, the .STL files were sent to our in-house exocad software for design.
A screw-retained crown and splinted crowns were designed, Prosthetic material was monolithic zirconia which was milled using the Redon GTR milling unit.
After an overnight sintering process of 6 hours for durability, the crowns were stained and glazed to match the natural teeth, completing the restoration.
Once the design and fabrication stages were completed, the crown for tooth number 26, which was to remain as a single unit, was adhesively bonded to its hexagonal base abutment, preparing it for insertion.
In contrast, the crowns for teeth numbers 15 and 16, due to the shorter length of the implants, required splinting for additional support and stability, therefore, non-hexagonal abutments were selected for these crowns.
• Placement of the Crown in the Mouth
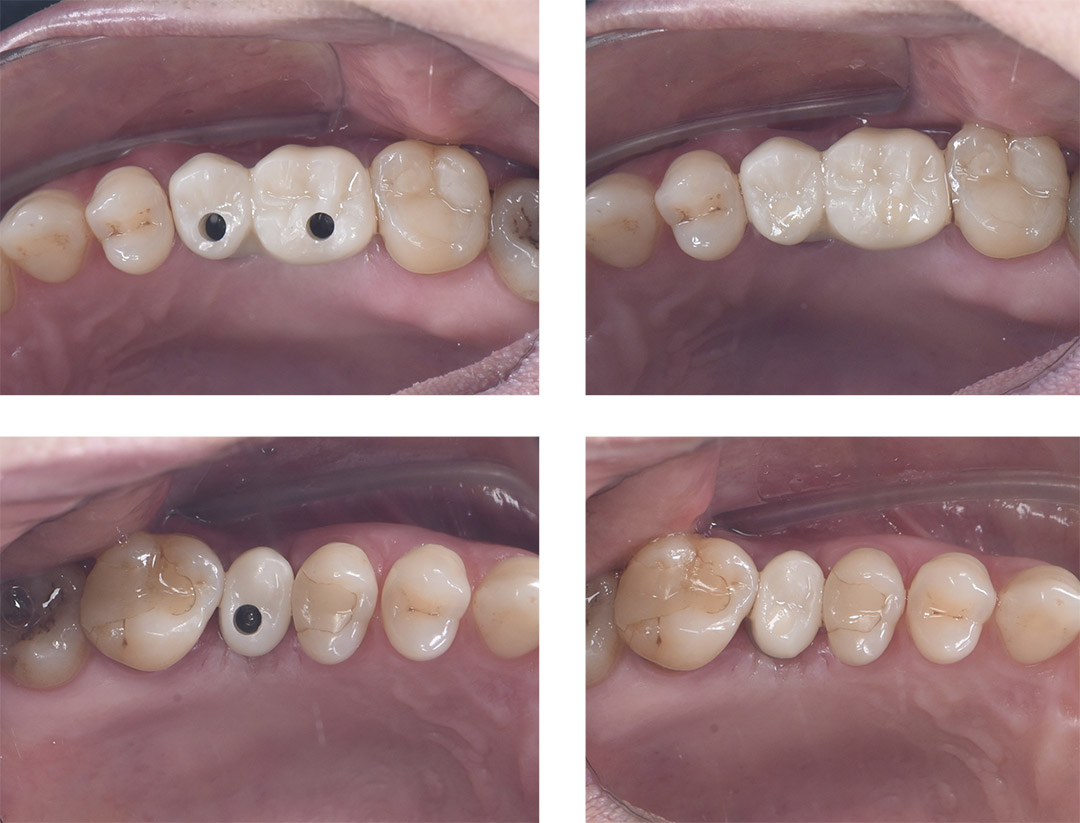
The crowns, once are ready for intraoral insertion, were placed into their respective sites.
The occlusion and contact with adjacent teeth were then diligently examined to ensure accuracy in alignment and functionality.
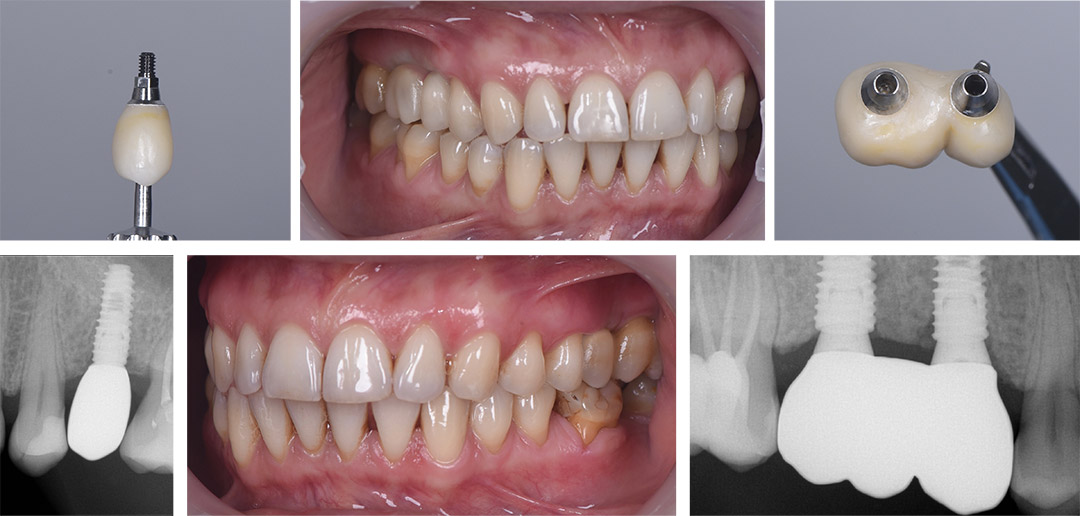
A periapical X-ray was employed to verify the proper placement of the implants and crowns.
Following confirmation of their correct positioning, the screw holes were sealed with teflon and flowable composite, finalizing the crowns' placement.
• Verification with Periapical X-Ray
• Comment of Dentist
For this particular treatment, the Helios 500 intraoral scanner was emploved, ensuring a streamlined and entirely digital workflow.
The scanner efficiently captured detailed images of each jaw in under a minute for both sides.
Upon completion of the manufacturing process, the fit of the crowns were found to be impeccable, with precise contac and occlusion.
Thanks to the Helios 500's capabilities in managing such a treatment, the case was brought to a successful conclusion within a 48 hours.