

A clinical case by StyleItaliano member Dr Nasim Akhatov
Class II proximal restorations require to fulfil several challenging in the daily clinical practice. The main task to achieve is an anatomically correct contour with a sealed contact zone. Adding to the challenge for creating the aesthetic tooth shape according to the nature. The aim of the present article is to emphasize the importance of restoring the posterior direct regions with a fast technique.
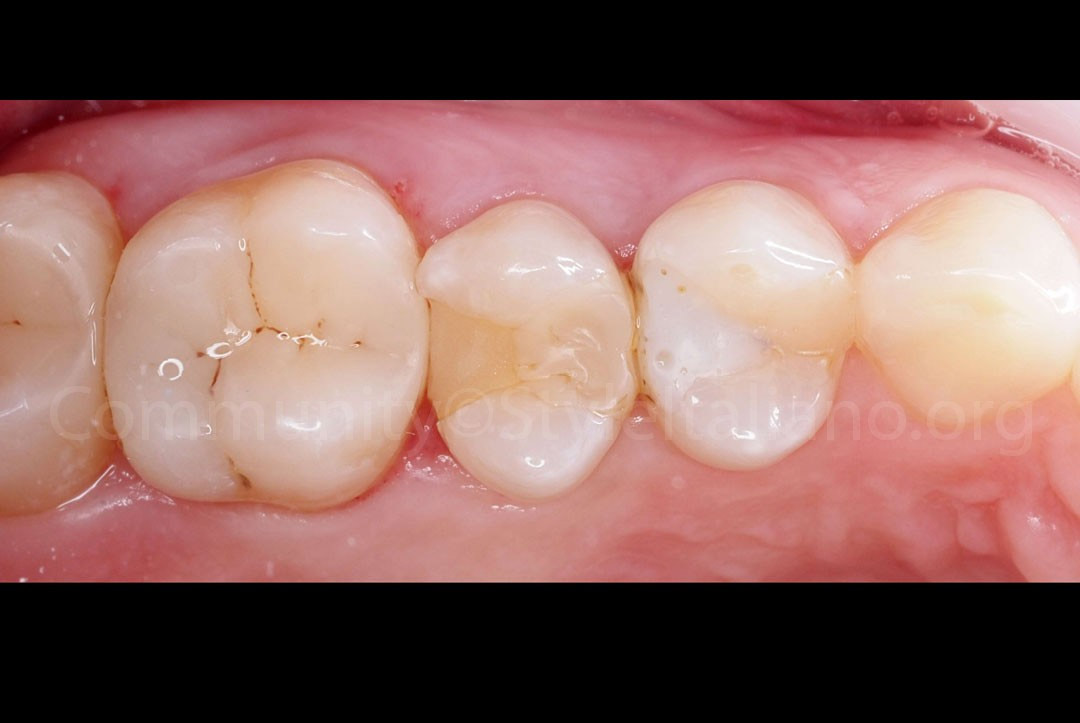
Fig.1
The premolars (24 and 25) presented a failed restoration that needs to be replaced with a new one due to a violation of the boundary seal. In addition, the patient complains of the sensitivity to thermal and chemical irritant. Tooth 26 was previously restored.
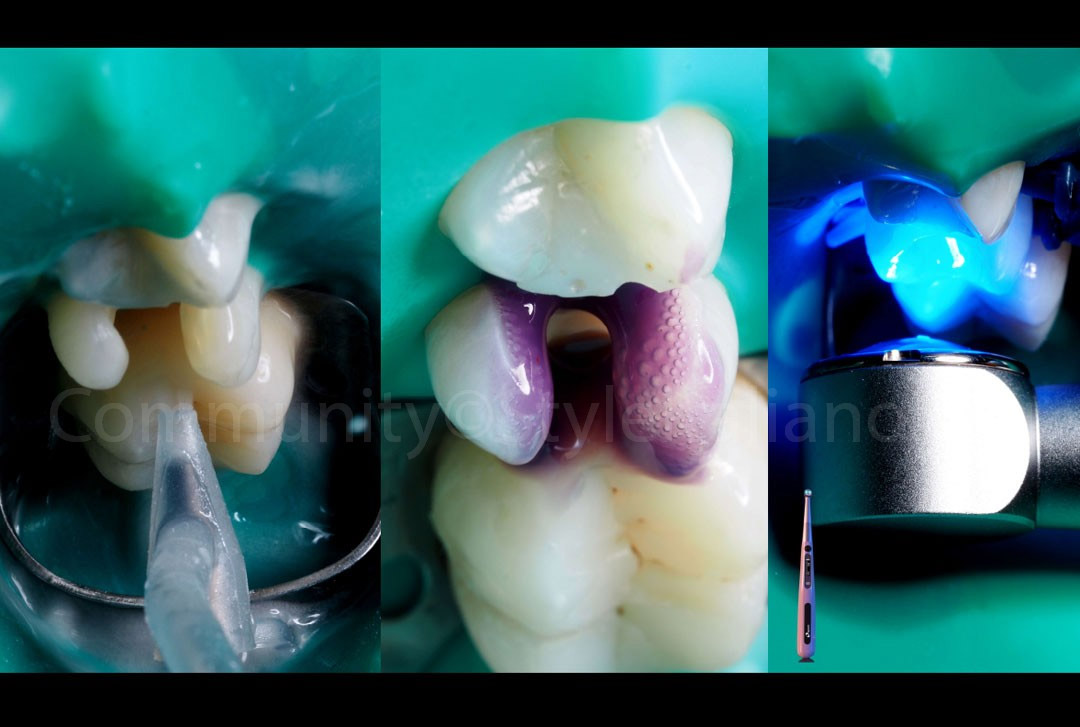
Fig.2
After isolation of the working field, the cavity of the tooth 25 was prepared. It is very important to create a proper design of the prepared mold for better matrix system adaptation.
The tooth cavity was prepared by sandblasting with 29 microns aluminium oxide before the application of the etching and the adhesive. Next, Curing Pen By Eighteeth was used to polymerize the adhesive.
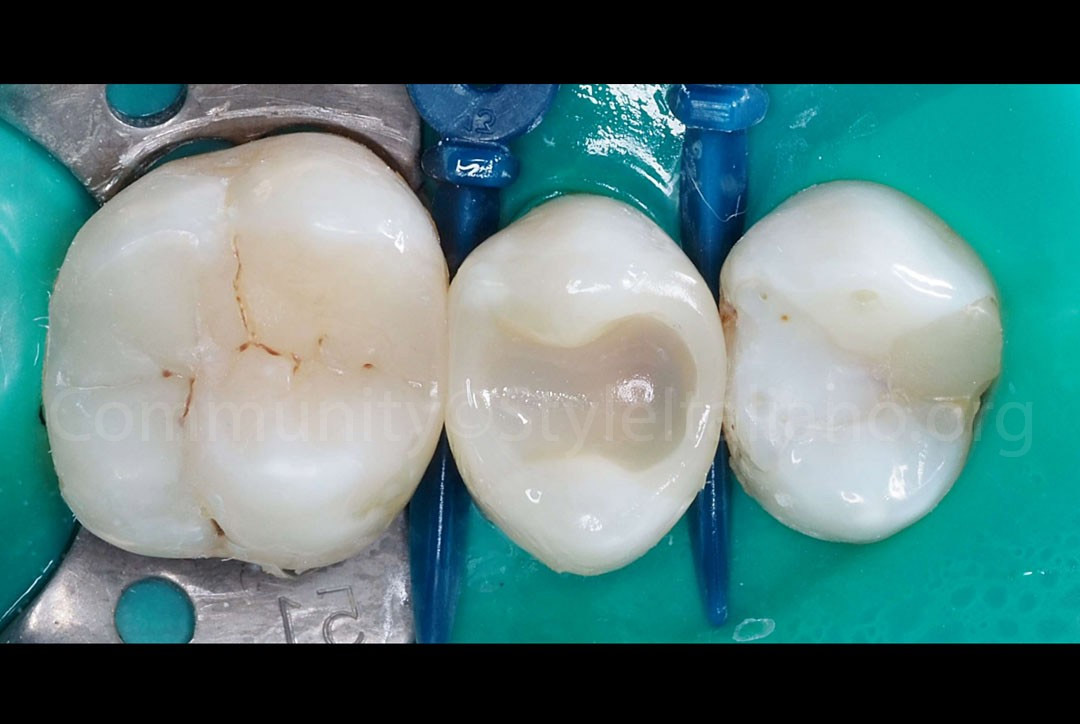
Fig.3
After matrix system adaptation, the proximal contacts of tooth 25 were restored with a conventional composite and a 2 mm thick bulk-fill resin composite was applied to the bottom of the class I cavity.
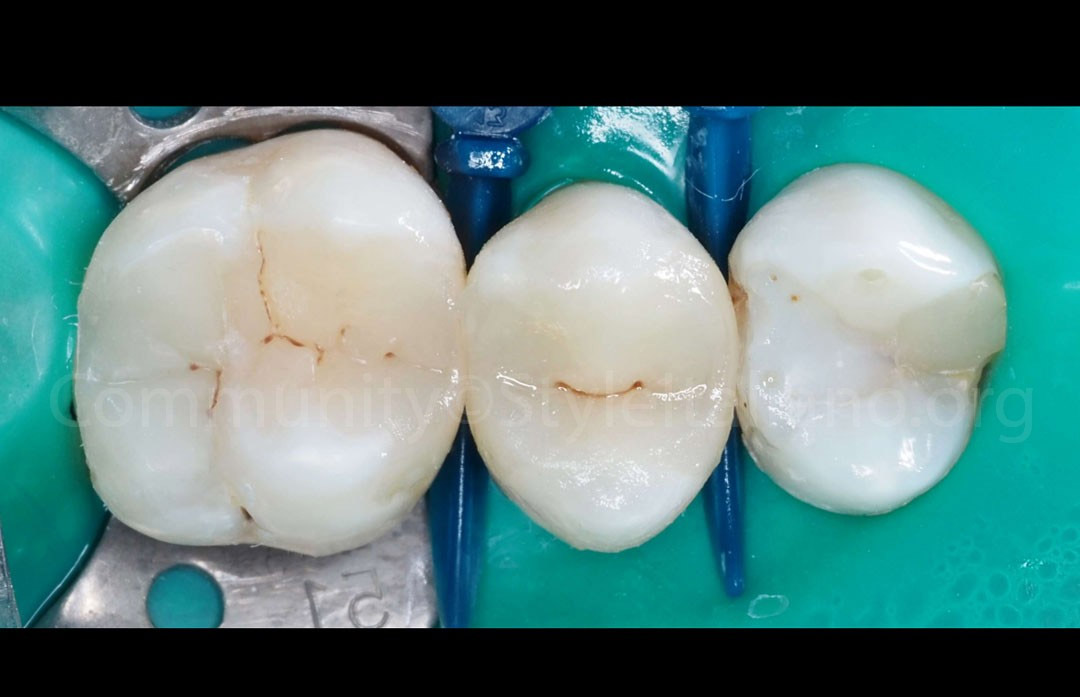
Fig.4
Final situation after tooth 25 anatomical structure restoration.
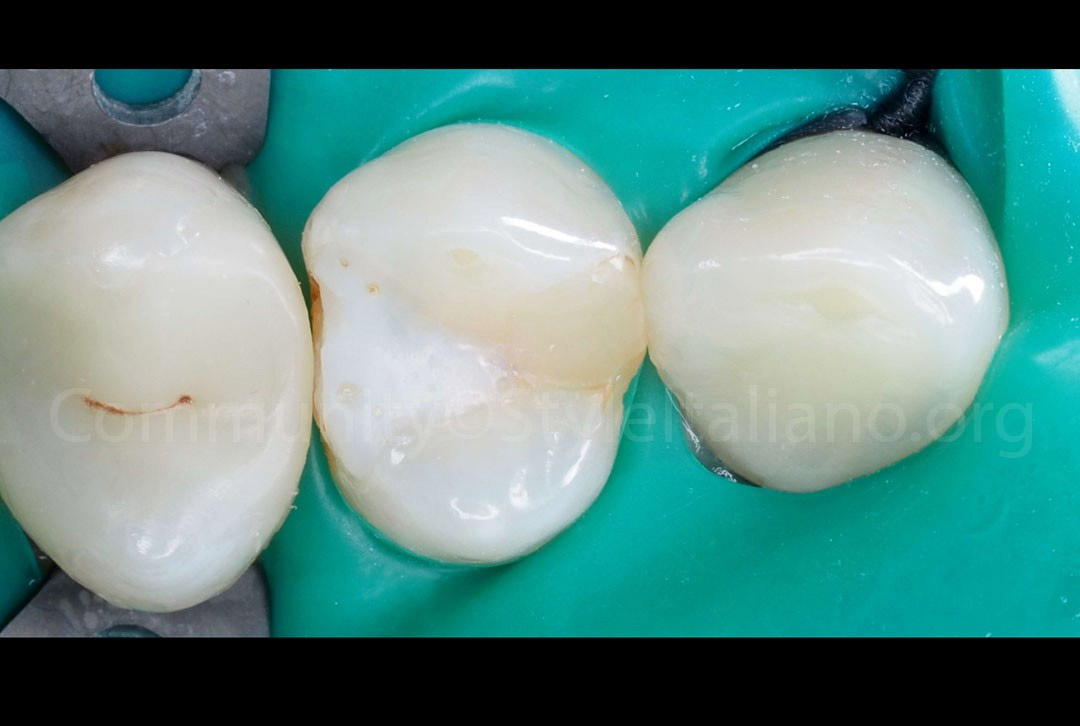
Fig.5
Starting the restoration of the tooth 24.
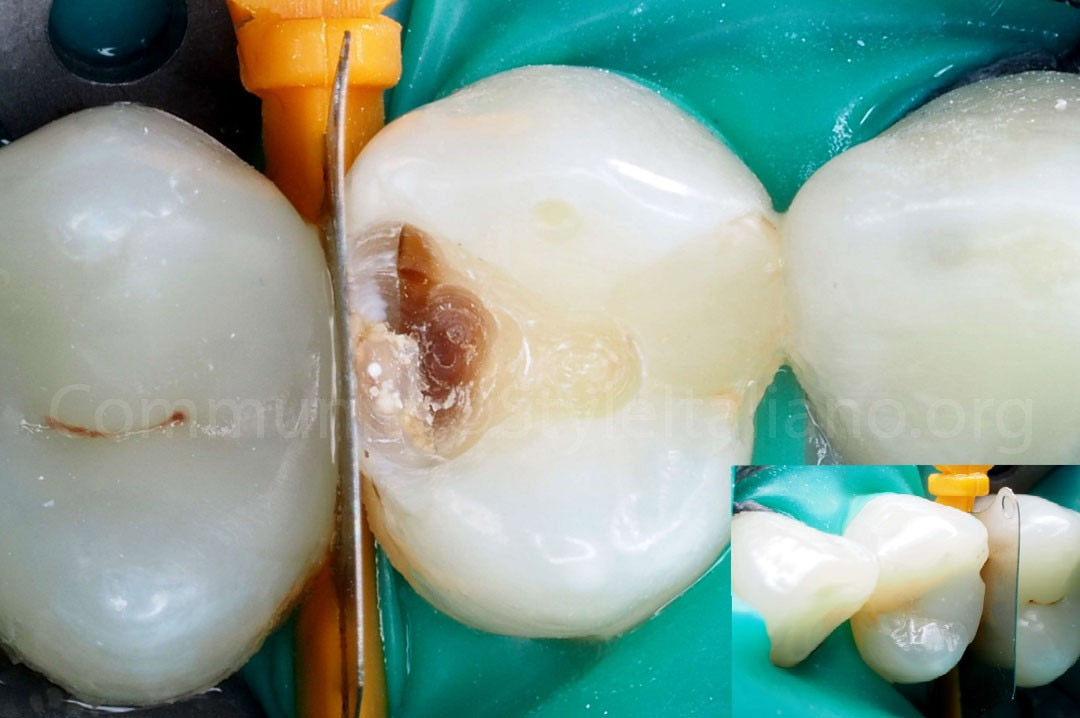
Fig.6
It is very important to isolate the tooth 24 before preparation so that the bur does not hit the proximal surface of the tooth 25. In this situation, a separation wedge was used.
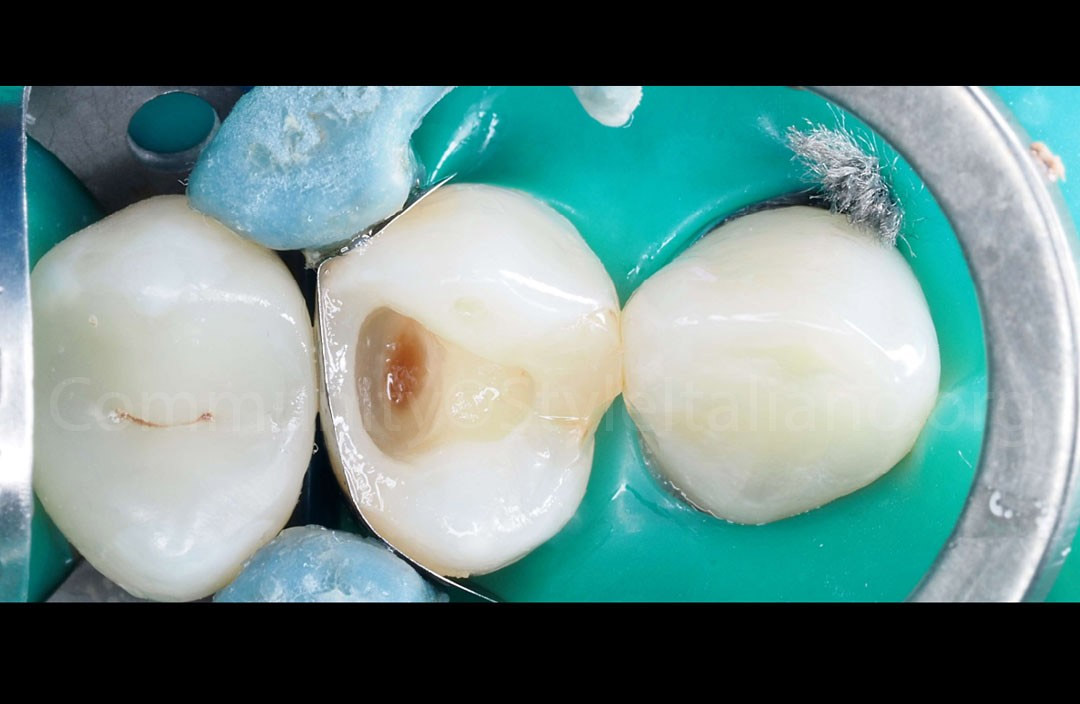
Fig.7
Correct adaptation of the matrix and the ring is the key to the success of the contact point. Proximal surface restoration of the tooth 24 becomes much easier when a correct shape of the neighboring tooth medial wall is available.
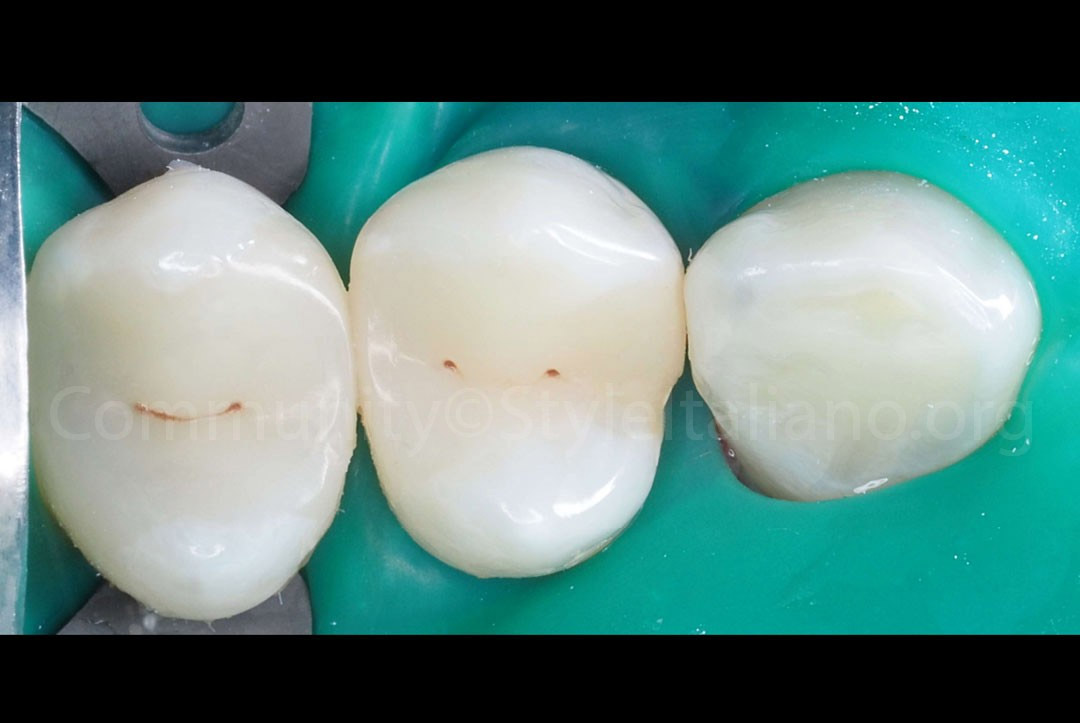
Fig.8
Final view of the restoration before grinding and polishing (tooth 24 was filled like tooth 25).
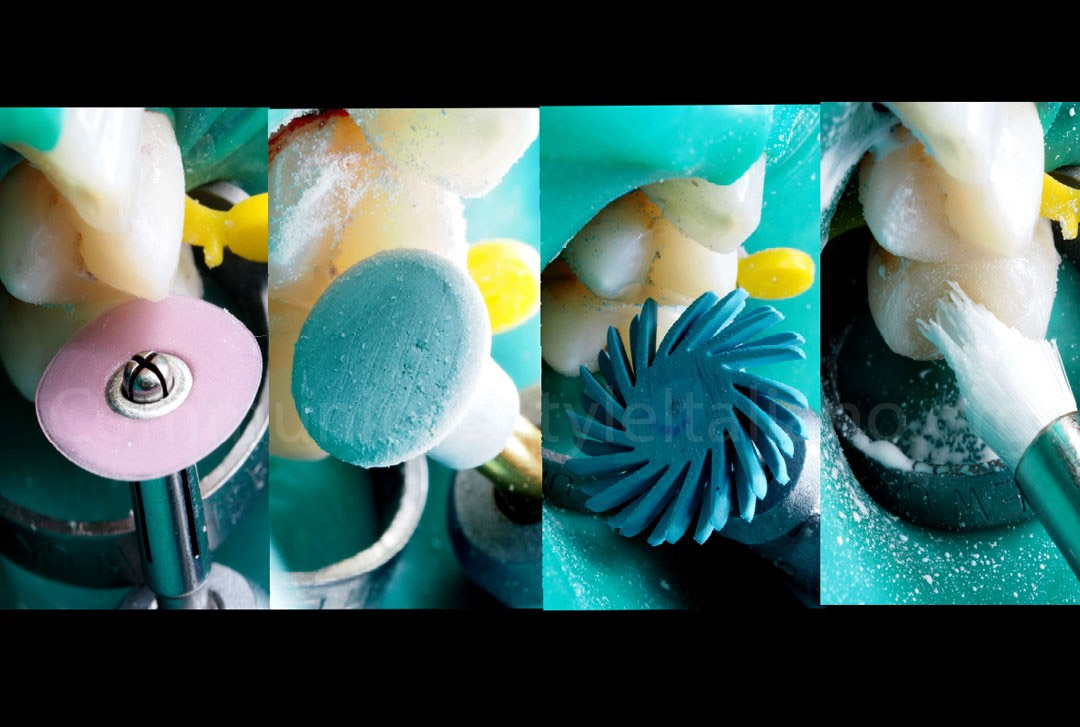
Fig.9
Finishing and polishing steps for the restoration of the tooth 24 and the tooth 25.
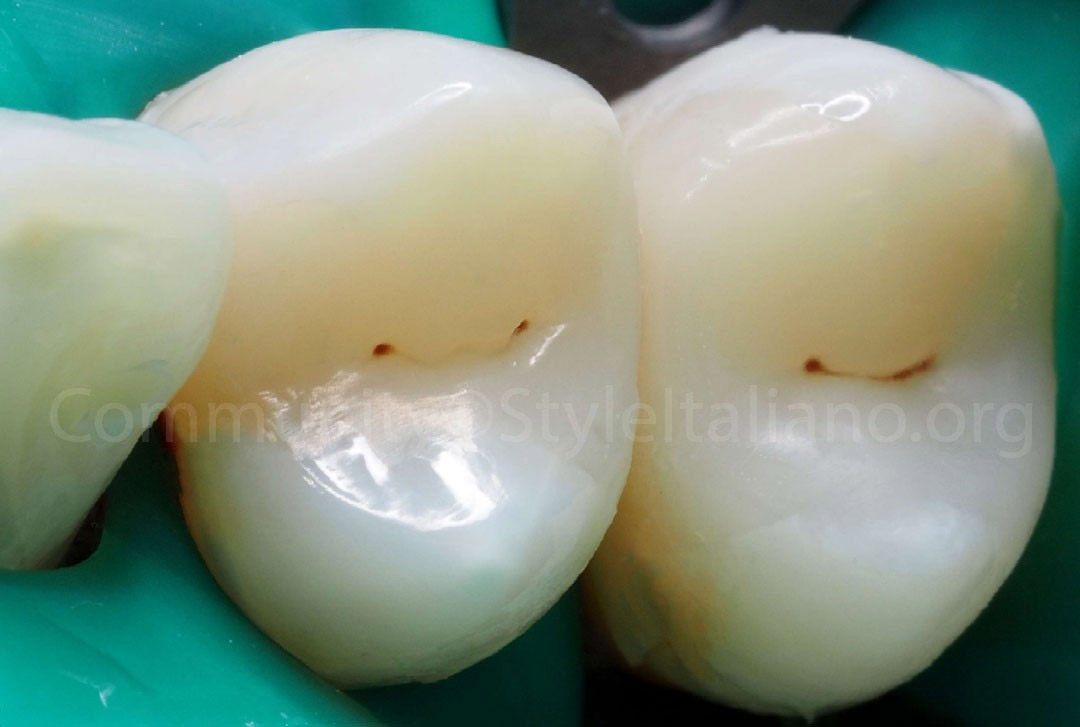
Fig.10
The glossy surface of the restorations indicated the correct use of polishing agents and materials.
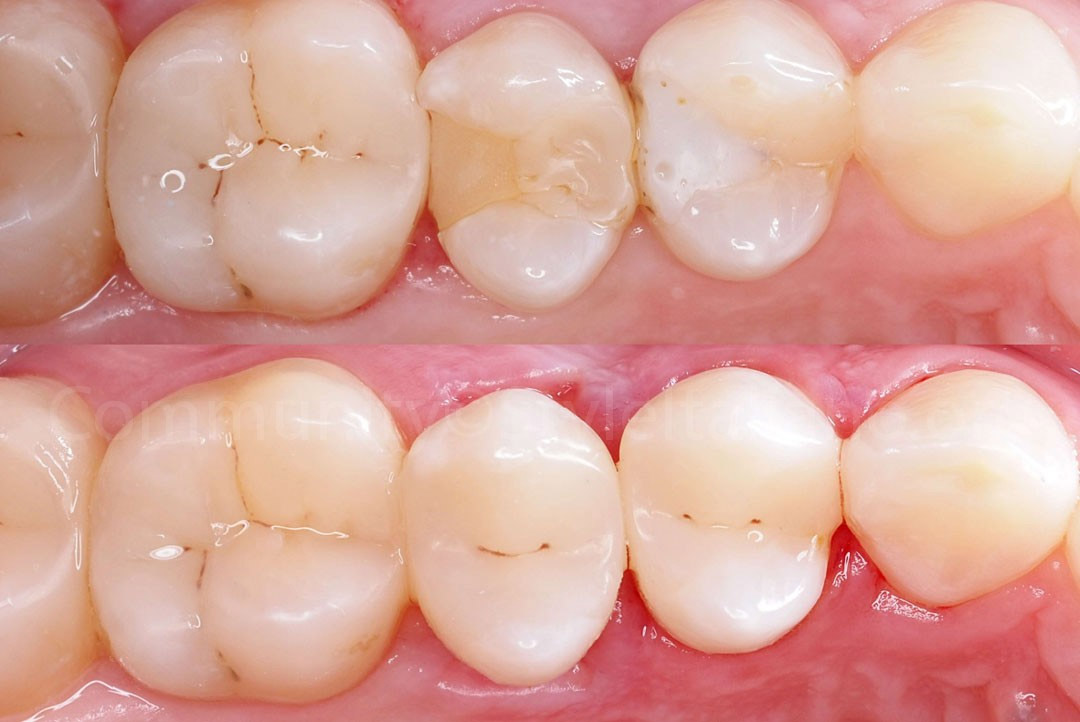
Fig.11
Before and after. The final situation after isolation system removal showed the good integration of the material and the technique used for restoring this kind of cavity.Teeth 24,25,26 were restored taking into account the function and aesthetics of these tooth groups.
Conclusions
An important task for the dentist is to create a long-lasting restoration with minimal tissue loss and a very simple technique that can be easily repeated in daily practice.
Bibliography
1. Manauta J, Salat A. Layers An Atlas of Composite Resin Stratification. 2012. Quintessence Pub.
2. Hardan L, Sidawi L, Akhundov M, Bourgi R, Ghaleb M, Dabbagh S, Sokolowski K, Suarez C, Szymanska M. One-Year Clinical Performance of the Fast-Modelling Bulk Technique and Composite-Up Layering Technique in Class I Cavities. Polymers 2021;13:1873.
3. Marchetti G. 10 TIPS on Posterior direct restoration in daily flow. 2018. Styleitaliano.org.
Original link: https://www.styleitaliano.org/direct-composite-restorations-function-and-aesthetics/
Disclaimer:
The third-party literature content referenced in this article is provided solely for the purposes of academic exchange and information sharing. It does not represent our position or endorsement of any technical parameter comparisons (if applicable) mentioned herein. The related data and conclusions are derived from independent research, and we shall not be held liable for the objectivity or accuracy of such content under any legal jurisdiction.